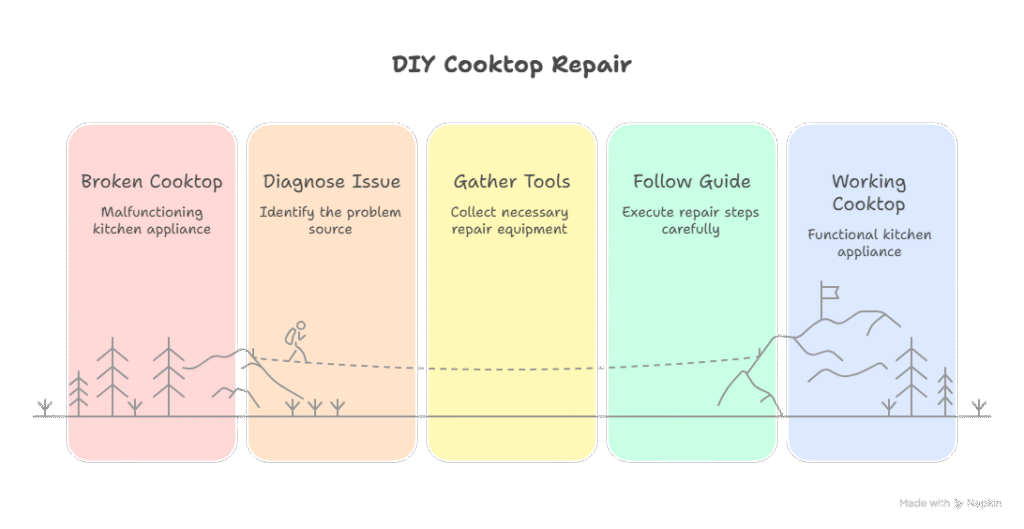
Repairing your cooktop yourself can be a rewarding and cost-effective endeavor. Whether you have a gas or electric model, understanding the basics can save you time and money.
This guide will walk you through the process of diagnosing and fixing common cooktop issues. You’ll learn how to handle problems like faulty burners and ignition issues.
Safety is paramount, so we’ll cover essential precautions before you start any repair. With the right tools and a bit of patience, you can tackle many repairs on your own.
However, knowing when to call a professional is crucial for more complex issues. Let’s dive into the world of DIY cooktop repair and empower you to take control of your kitchen appliances.
Safety First: Preparing for Cooktop Repair
Before you begin any cooktop repair, prioritizing safety is essential. Accidents are preventable with the right precautions and equipment. Always start by disconnecting the power or turning off the gas supply.
Wear appropriate protective gear, such as gloves and safety goggles. This helps protect against cuts and burns. Make sure your workspace is clean and well-lit to avoid any hazards.
Here’s a simple checklist to follow for safety:
- Disconnect the appliance from power or gas.
- Wear safety goggles and gloves.
- Ensure proper ventilation in the repair area.
- Keep a fire extinguisher nearby for emergencies.
By following these steps, you can ensure a safer environment while conducting your DIY repairs. Safety always comes first when working with electrical and gas appliances.
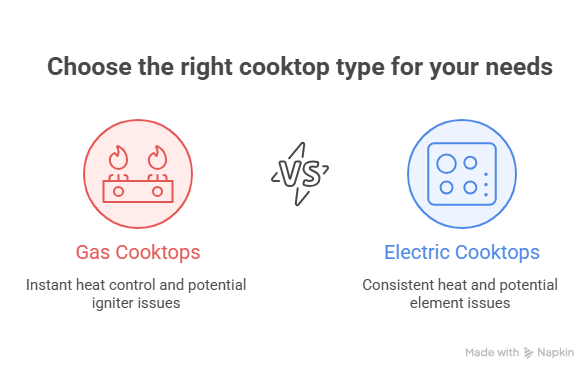
Understanding Your Cooktop: Gas vs. Electric
Knowing the type of cooktop you have is crucial. Gas and electric cooktops have distinct components and problems. Each requires different techniques for repair and maintenance.
Gas cooktops rely on burners powered by natural gas or propane. They offer instant heat control but may face issues like igniter faults or clogs. Ensure burners are unclogged for optimal performance.
Electric cooktops consist of heating elements powered by electricity. They might experience issues with the heating element or control knobs. Familiarizing yourself with the following basic components is useful:
- Burners (Gas)
- Igniter (Gas)
- Heating Element (Electric)
- Knobs and switches
Understanding these differences aids in diagnosing problems effectively. Proper identification saves time and guides your repair efforts accurately.
Garbage Disposal Not Working? How to Fix a Jammed or Humming Disposal in Simple Steps
Common Cooktop Problems and How to Diagnose Them
Cooktops can experience various common issues that affect functionality. It’s important to identify these early to minimize damage. Troubleshooting can often indicate the root cause.
A frequent problem with gas cooktops is burner inefficiency. If the flame is uneven, check for debris blocking the ports. Another issue is the igniter; if it doesn’t spark, it may need cleaning or replacement.
Electric cooktops can suffer from heating problems. If a burner doesn’t heat, it might be due to a faulty heating element or switch. A multimeter can help verify electrical continuity, ensuring parts function properly.
Here’s a list of common problems to check for:
- Uneven flames or no spark (Gas)
- Burners not heating (Electric)
- Temperature inconsistencies
- Faulty knobs or switches
By diagnosing accurately, you can apply suitable repairs. This approach saves time and ensures the cooktop operates efficiently.
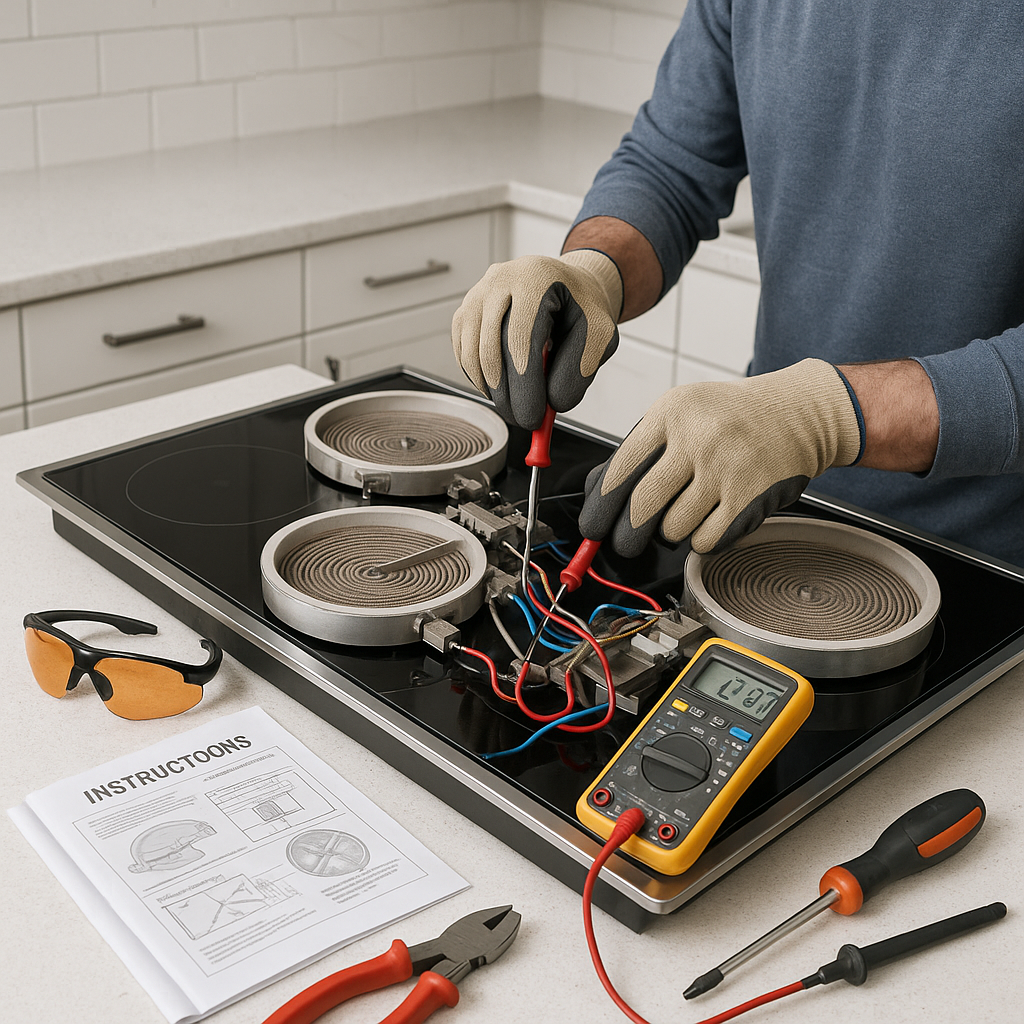
Tools and Materials Needed for DIY Cooktop Repair
Tackling cooktop repairs requires the right tools. Having these ready ensures the process is smooth and efficient. Before starting, make sure you’re fully equipped.
Here’s a handy list of essential tools and materials:
- Screwdrivers (Phillips and flathead)
- Multimeter for electrical testing
- Replacement parts specific to your model
- Cleaning cloths
- Protective gloves and goggles
A well-prepared DIYer can handle most basic repairs with these essentials. Always double-check your cooktop model’s manual for any special tools required. This step guarantees compatibility and safety during repair.
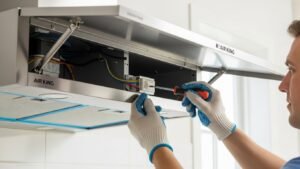
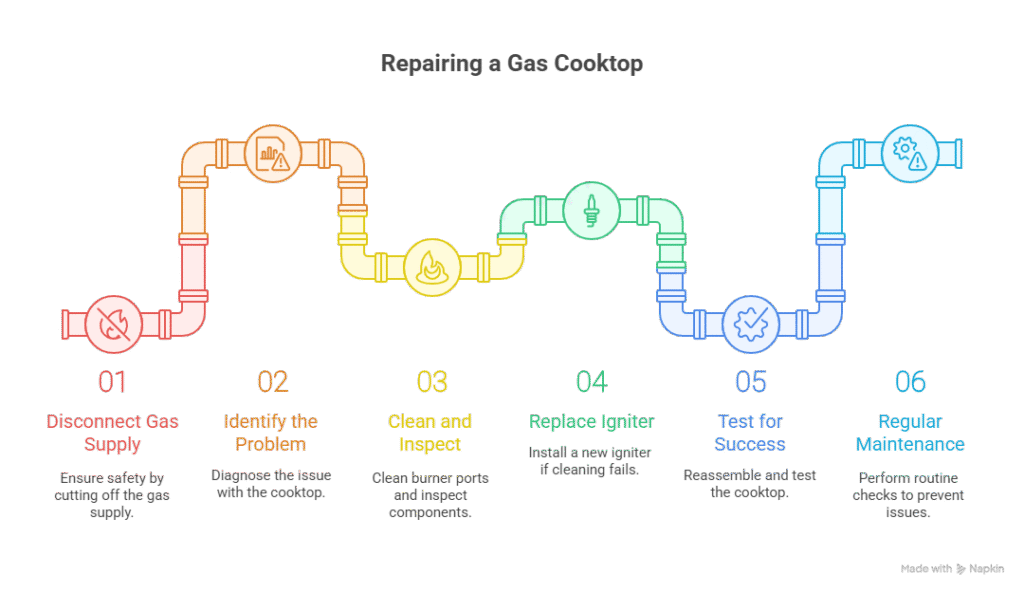
Step-by-Step Guide: Repairing a Gas Cooktop
Repairing a gas cooktop can feel daunting, but with some guidance, it’s manageable. First and foremost, disconnect the gas supply. Safety must always be your top priority.
Step 1: Identify the Problem
Before you can fix your cooktop, identify the issue. Common problems include:
- Faulty igniters
- Clogged burner ports
- Uneven flame
Knowing what you’re dealing with helps streamline the process.
Step 2: Clean and Inspect
Once the issue is clear, start by cleaning the cooktop. Use a soft brush and needle to clean burner ports. A clean cooktop can solve many issues.
Step 3: Replace the Igniter
If cleaning doesn’t work, you might need to replace the igniter. Follow these steps:
- Remove the burner grates and caps.
- Detach the wires connected to the igniter.
- Install the new igniter and reconnect wires.
Step 4: Test for Success
Reassemble the cooktop and reconnect the gas supply. Test the burners to ensure they ignite smoothly and burns evenly.
Extra Tip: Regular maintenance checks can prevent many issues and extend your cooktop’s life. Always keep your workspace clean and organized for best results.
Step-by-Step Guide: Repairing an Electric Cooktop
When dealing with an electric cooktop, approach the repairs methodically. Turn off the power supply to prevent any accidents. Safety is vital during repairs.
Step 1: Identify Common Issues
Typical problems with electric cooktops include:
- Broken heating element
- Malfunctioning infinite switch
- Control panel issues
Pinpointing the problem saves time and effort.
Step 2: Troubleshoot the Heating Element
Check the heating element for defects. Use a multimeter to test its continuity:
- Remove the element from the cooktop.
- Place the multimeter probes on the terminals.
- A zero reading indicates the element needs replacing.
Step 3: Address the Infinite Switch
If the element is intact, examine the infinite switch. Steps for replacement:
- Disconnect the wires from the switch.
- Remove and replace with a new switch.
- Reattach the wires firmly.
Step 4: Test and Confirm
Reassemble the cooktop, then switch on the power supply. Test each burner to ensure they heat evenly.
Routine checks can prevent failures. Keep parts clean and avoid overloading circuits.
Need Same-Day Washing Machine Repair In South Central Pennsylvania? Click Here!

When to Call a Professional: Knowing Your Limits
Not all repairs are suitable for DIY enthusiasts. Recognizing when to call in professional help can save you from costly mistakes.
Consider professional service if:
- You’re unsure about handling gas components safely.
- The electrical system appears complex or damaged.
- You suspect a gas leak or other hazardous issues.
Complex repairs may require specialized skills and tools. Ensuring safety and avoiding additional damage is crucial. Remember, professionals have the experience to manage intricate tasks and provide peace of mind.
Maintenance Tips to Prevent Future Cooktop Issues
Regular maintenance can significantly extend the life of your cooktop and prevent costly repairs. Simple routine checks can avert many common problems.
Here are some practical maintenance tips:
- Clean burner ports regularly to prevent clogs.
- Inspect gas lines and connections for wear and tear.
- Check electric connections and ensure they are secure.
- Clean the cooktop surface thoroughly to avoid buildup.
- Schedule periodic professional check-ups for peace of mind.
Incorporating these practices into your routine will ensure your cooktop remains efficient and safe. Consistent care can save time and money in the long run.
Conclusion: Save Money and Stay Safe with DIY Cooktop Repair
Repairing your cooktop yourself can be a rewarding experience. By following this guide, you can address issues promptly, saving both time and money.
Remember, safety is paramount. Always ensure your work area is secure, and follow guidelines to prevent accidents. When uncertain, don’t hesitate to seek professional help.
By effectively maintaining and repairing your cooktop, you not only extend its lifespan but also enhance your skills and self-reliance.